
Flight Sim Hardware
MobiFlight setup guide (2026): connect your cockpit controls
The short answer
Connect a flight-sim panel with MobiFlight. Follow the hardware, project, aircraft mapping and first-test steps, with links to current official instructions.
Last updated November 2026
What's covered8
- MobiFlight setup: choose the right starting point
- Install from the official source
- Connect the board or panel
- MobiFlight setup: map the exact aircraft
- Run a small test in the simulator
- Find the fault by following the signal
- Keep a working copy before expanding
- Verdict: build MobiFlight setup from one working control
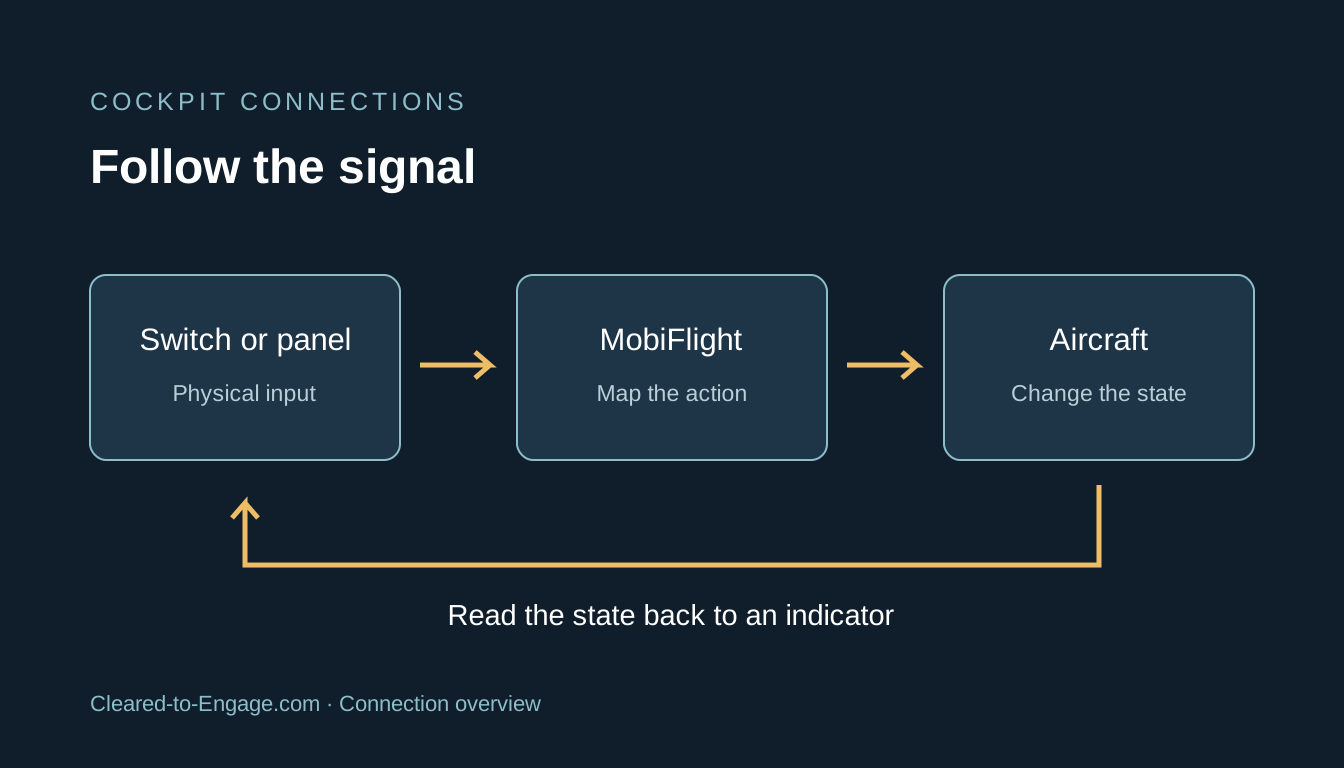
MobiFlight setup starts with a small test: make one switch change one thing in the aircraft. Then add a light that shows the state coming back from the sim. That proves both directions work before you spend time on a whole panel.
MobiFlight connects cockpit hardware to a flight simulator. This is a guide to the steps and checks involved. Get the software from the official MobiFlight site, and use its current getting-started guide for the exact screens in your release.
Start with the exact hardware and aircraft you use. A USB connection proves the PC can see a device, but it does not prove that a switch is mapped to the right aircraft function. Check the hardware setup first, then the aircraft mapping and simulator connection. Save a working project before adding more controls, and keep the maker's original files.
MobiFlight setup: choose the right starting point
There are two common routes. A home-built panel needs a supported board and its device setup. A ready-made panel may arrive with firmware and files from its maker. Work out which route applies before you change anything.
For a new DIY board, start with MobiFlight's board list. Match the full model name, including the board version. The official docs show which boards are recommended and which are supported. They also list unsupported boards. A similar name or shape does not put a board on the supported list, nor does a matching USB socket.
For a bought panel, use the maker's instructions for that exact model. Keep its files in a folder with the panel name and aircraft name. A file meant for another panel may expect different inputs. A file meant for another aircraft may send the wrong commands even when the physical layout looks right.
If you already have working controls, save a copy of their setup first. Do not start by changing every board or merging every file. Test the new panel on its own, then bring the working parts together. That makes a fault easier to trace.
Keep the hardware and aircraft layers apart
The hardware layer tells MobiFlight which device it can read or drive. The aircraft layer tells it what that device should do in the sim. Both layers must match the task.
For example, a switch can be detected correctly while its landing-light action does nothing. The input has reached the software; the next check is the selected aircraft action. Replacing the USB cable at that point may not help.
The reverse can happen too. A light may show a test signal from the board but fail to follow the aircraft. Check the output's source value and the aircraft state. A local light test and a live sim test answer different questions.
Install from the official source
Close Microsoft Flight Simulator before installing MobiFlight, as the official getting-started guide directs. Download the current release from the project's own site. Follow the installer and current docs rather than a version number quoted in an old video.
The docs describe a new project system in MobiFlight v11. An older tutorial can still help with a device, but the way you create and open a project may differ. Match the tutorial to the release on your PC before you follow its menu names.
Do not collect installers from forum attachments just because a guide is old. Keep the official download and release notes together. If a panel maker needs a particular release, check that advice against its current support page before installing it.
A security warning calls for a check of the file and source. Do not treat a broad instruction to turn off protection as a routine setup step. Use the project's documented installation and support route if a trusted release will not install.
Create a project you can return to
Create a project using the current project instructions. Give it a name that identifies the panel and aircraft. Keep an untouched copy of any maker file, then work on a separate copy for your own setup.
Write down the simulator and aircraft you plan to use. Include the exact add-on rather than just the aircraft family. Two aircraft that model the same airliner can expose different controls to external software.
Keep notes on the first working test. Record which switch you moved, the action you chose and the result in the cockpit. Those notes give you a known starting point if a later edit breaks the setup.
Connect the board or panel
For the DIY route, connect a board listed in the official docs. Follow the prompt to install its matching firmware. When MobiFlight cannot identify a board type, use the linked guide for ambiguous boards instead of picking the closest-looking name.
A panel supplied with firmware needs its maker's route. Do not assume the steps for a bare board apply to it. Check whether the panel needs a board configuration, an aircraft profile, or both. Keep those roles clear when you download files.
The official beginner workshop uses a small board, switches, an encoder and lighted buttons. It is a useful worked example if you are building from parts. Follow its wiring diagrams for that kit; do not transfer a pin layout to a different board without checking it.
Use the official documentation to reach the board and device guides. Wiring, board support and output limits belong to the instructions for the exact parts. This guide does not provide a universal wiring plan.
Check recognition before mapping
Open the device or module view for your release. Confirm that the board or panel you meant to connect appears. If several panels are attached, identify each one before assigning controls.
When nothing appears, check the physical connection and the maker's driver notes first. When the device appears but one input is missing, focus on that input's device setup. When the input appears but the aircraft does not react, move on to the mapping and sim connection.
Change one thing at a time and repeat the same test. A long list of edits can hide which change solved the fault. Keep a note when you replace a cable, change a setting or reload a file.
MobiFlight setup: map the exact aircraft
Use an action or preset intended for the aircraft you loaded. A default control can work in a stock plane and fail in a more complex add-on. That does not, by itself, show that the panel is broken.
FlyByWire's A32NX API guide explains why this matters. Custom aircraft can use their own variables and events. External software must send commands that the aircraft understands, rather than rely on a default hardware driver alone.
An input is a command you send to the sim. An output is a value you read from it. A switch may send a parking-brake command; a light may read the parking-brake state. Build and test those as separate parts of the same task.
Choose one simple function first. The official getting-started example uses a parking-brake switch and indicator LED. A small test makes it clear which physical control, command and returned state you are checking.
Check every position of a switch
A momentary button and a switch that stays in position are different devices. A switch may need an action for each position. Use the official device guide to select the right input type and events.
Test both directions. A switch that turns a light on but cannot turn it off is only partly mapped. Make sure the aircraft changes state as intended, then check what happens when you move the control back.
For an encoder, test each turn direction on its own. Confirm that the chosen value changes in the right direction and by the amount you expect. Add push or modifier functions only after the basic turn works.
These are checks to perform, not claims that every aircraft has the same event names. Follow the current aircraft documentation when a preset is absent or unclear. Save the working mapping before you try another one.
Run a small test in the simulator
Load the intended aircraft and place it at a gate or parking spot. Start the MobiFlight connection with the Run control described in the current docs. Then test the function you mapped while you can see its cockpit state.
For the parking-brake example, move the physical switch. Confirm that the brake changes state in the aircraft. Then confirm that the panel light follows the returned state. Repeat the test in the other direction.
If the input works and the light does not, focus on the output path. Check the selected value and device. Then check any conditions. If neither works, check that the project is running and connected to the intended sim before changing both mappings.
Do not judge the whole panel from one button. Once the first test works, add controls in small groups. Save between groups and keep the last working copy. That gives you a clear route back if a later mapping causes trouble.
Find the fault by following the signal
Work from the physical control toward the aircraft, then follow the state back to the panel. This avoids mixing a device fault with an aircraft-specific command issue.
- Device missing: check the board model and connection. Then check firmware against the maker's device instructions.
- Device present, input missing: check the assigned physical input and the device configuration.
- Input present, aircraft unchanged: check the loaded aircraft, selected action and active simulator connection.
- Aircraft changes, light unchanged: check the output source and the light's device setup.
- Only one aircraft fails: compare that aircraft's API or preset requirements with the working aircraft.
Treat connection components as simulator-specific. The official docs have separate input and output types for Microsoft Flight Simulator, X-Plane and FSUIPC. Do not add every bridge named in an old tutorial without checking whether your chosen route needs it.
For Microsoft Flight Simulator, the docs include guides for the WASM module and for enabling it in MSFS 2024. Use the current guide for the sim you run. A successful board connection does not prove that this software connection is working.
When asking for help, identify the hardware model and MobiFlight release. Include the simulator and aircraft too. State the smallest failed test and what still works. Use the project's guide to sharing logs if support requests one.
Keep a working copy before expanding
Name files so you can tell which aircraft and panel they serve. Keep downloaded originals apart from edited copies. Save after a change that passes its test, and avoid overwriting the only working file with an experiment.
Before combining several panels, confirm each works alone. Note which physical unit each mapping uses. A setup that appears correct on screen can still point at the wrong device when two similar panels are connected.
Check the saved project after reopening it. Repeat the small input-and-output test before a flight. If a software or aircraft update changes behavior, compare against that known test rather than rebuilding the full setup at once.
Verdict: build MobiFlight setup from one working control
Start MobiFlight setup with a supported device, a current project and the exact aircraft's mapping. Prove one input and one output, save that result, then expand. Get downloads and firmware from the official sources. Use the docs for wiring and the screens in your release.
For the rest of the cockpit, see our flight simulator hardware guide and flight-sim panel guide. Check the compatibility reference when choosing another control; a supported platform and a working aircraft mapping are separate checks.